
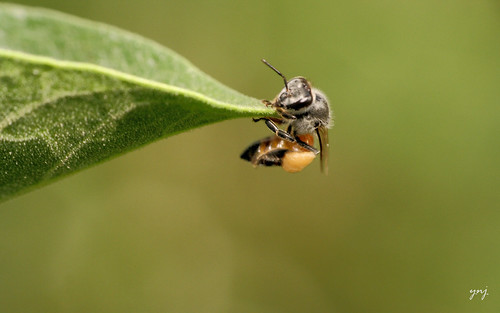
Any time you want to photograph a spider, the first reaction is the hide under a leaf.. and if you are lucky you can sometimes access it even in this position!

Friday, June 29, 2012
Hanging
Ball Pen Tip

Stacked 5 separate handheld photos taken with 70-300 + Raynox DCR250 + Diffuser 1.0 (pop-up flash)
basil flowers "तुळशीच्या मंजिरा"

its basil flowers "तुळशीच्या मंजिरा". Two hand held photos stacked together in CombineZP (Half of the water drops coming from each shot :)
Tuesday, June 26, 2012


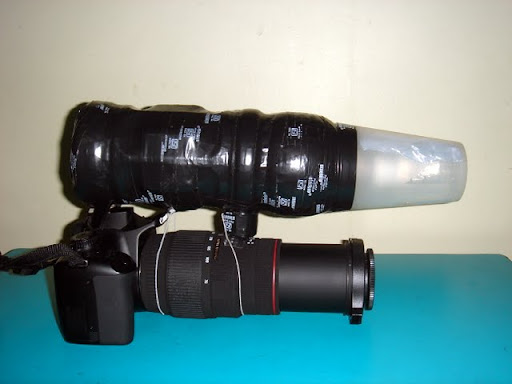
Macro Flash Diffuser
Diffuser 2.0 something that will work with my speedlight (YN-467).. actually any speedlight. Cost : ZERO (almost), Time taken: 15 mins
Result: with same power i can now move from f/8 to f/18 and with better diffused light.
Here is the Diffuser 1.0 prepared 2 years back (which i still use with pop-up flash)
Monday, June 25, 2012

Sunday, June 24, 2012

Friday, June 22, 2012

Wednesday, June 20, 2012


Tuesday, June 19, 2012

Sunday, June 17, 2012

Friday, June 15, 2012


Monday, June 11, 2012

Sunday, June 10, 2012

Apalaghar Orphanage shoot
(BeingSocial) Apalaghar Photo Shoot

(BeingSocial) Apalaghar Photo Shoot

(BeingSocial) Apalaghar Photo Shoot

(BeingSocial) Apalaghar Photo Shoot

(BeingSocial) Apalaghar Photo Shoot

(BeingSocial) Apalaghar Photo Shoot

(BeingSocial) Apalaghar Photo Shoot

(BeingSocial) Apalaghar Photo Shoot

(BeingSocial) Apalaghar Photo Shoot

(BeingSocial) Apalaghar Photo Shoot

(BeingSocial) Apalaghar Photo Shoot

(BeingSocial) Apalaghar Photo Shoot

(BeingSocial) Apalaghar Photo Shoot

(BeingSocial) Apalaghar Photo Shoot

(BeingSocial) Apalaghar Photo Shoot

(BeingSocial) Apalaghar Photo Shoot

(BeingSocial) Apalaghar Photo Shoot


Tuesday, June 5, 2012
DIY R-Strap (Yogendra's Design)
I have always wanted to use R-Strap but never wanted to shell out $60 to $ 80. So I ended up making my own for less than a dollar (in cash) and a few spare stuff (a carabiner and laptop strap).
Here is a picture that shows the asembly (and brief explanation below on how i did this.

- Step 1 was to find the right screw which was the easiest of all. Just went to hardware store and got the screw with 1/4th inch diameter.
Actually I was having the screw for past 1 year but was struggling with the next step, to connect it to camera and have a loop connected to the screw or put a hole into the screw.- I convinced a nearby cobbler to put a large rivet (which are used on ladies bags or on ladies belts) on a small piece of nylon strap. The rivet was big enough to pass the screw threads but not big enough to pass the screw head. Then put another rivet to ensure a loop is created which would not fall off with the weight.
The cobbler was not convinced with what he was doing this for and charged me hefty Rs 15 /- (about 30 US cents)- I put the screw through the rivet hole and fixed it with a bolt. For extra precaution i put a washer between screw head and the rivet. (see image on left bottom) then put the screw into the camera tripod hole.
- Then took a carabiner (was fortunate to get this one with a water bag) and put into the loop and confirmed that it was strong enough to hold the camera.

- For the last part, many people know my love of laptop bags so i have few spare straps. I took the strongst (but thinnest) one and hooked to the carabiner and it was all set.
Once i was done, a piece of advice came from my 7 year old son... "dad be careful when you put your big lens on camera" (70-300 that's as big as i have :D). Apparently i haven't been having any problem with either lenses i have with this R-Strap.
Please leave your feedback / comments / questions / suggestions. Will be happy if anyone needs help or wants to see it live (in Pune, India).
Hope this helps,
Yogendra (https://www.facebook.com/joshiyogendra)
Friday, June 1, 2012

Subscribe to:
Posts (Atom)